

Building a custom home is universally recognized as one of the most rewarding, yet undeniably daunting, projects a person can undertake in their lifetime. It represents the ultimate expression of your personal style, your daily lifestyle needs, and your long-term financial goals. Unlike buying a pre-existing house where you are forced to compromise on floor plans or deal with someone else’s hidden DIY mistakes, a custom build gives you a blank canvas. However, that blank canvas comes with an overwhelming number of decisions.
The reality of custom home building is that the complexity of managing permits, organizing timelines, and coordinating specialized trades can quickly overwhelm first-time builders. Without a strict plan and a deep understanding of the sequence of construction, budgets can spiral out of control, and timelines can stretch from months into years. The secret to a successful build is not just having a vision, but understanding the mechanics of how that vision is brought to life from the soil up.
This guide is designed to break down the home-building journey phase-by-phase. We will bypass the fluff and focus on actionable advice for managing the site, ensuring the structural integrity of the house, and executing the finishing details flawlessly. By meticulously planning your site preparation, prioritizing the bones of the structure, and focusing on long-term energy efficiency, you can successfully navigate the chaos of construction and step through the front door of your forever home.
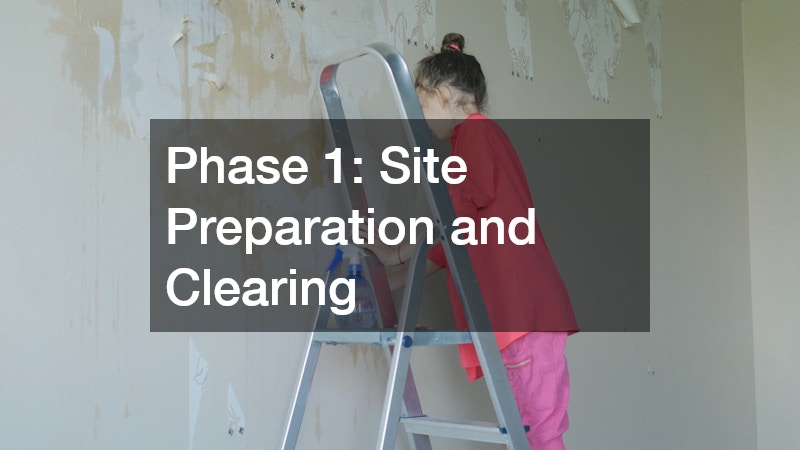
Phase 1: Site Preparation and Clearing
The very first steps of prepping raw land for construction set the tone for the entire project. This phase is less about building and more about safe, strategic land management to ensure your future home sits on a stable, hazard-free environment.
Audit Your Property for Hazards Before Tear-Down
If you have purchased a teardown property or land with existing, abandoned structures, you must audit the site before a single piece of machinery touches the soil. Older homes, barns, and even buried sheds often contain hazardous materials that require careful, legally compliant removal. Before proceeding, test any dilapidated structures for asbestos, which is frequently found in old floor tiles, popcorn ceilings, and pipe wraps. Lead paint is another massive concern for buildings erected before 1978.
Furthermore, you need to conduct an environmental audit of the land itself. Map out existing tree roots, buried oil tanks, and large subterranean boulders that could interfere with your desired foundation footprint.
When it comes to actually clearing the site, taking the DIY route to save money is a dangerous gamble. Hiring a specialized local demolition contractor ensures that hazardous materials and old, crumbling foundations are removed according to strict municipal codes. These professionals handle the chain-of-custody documentation for hazardous waste disposal, keeping your site safe from contamination and legally compliant with local environmental protection laws.
To properly audit your site, ensure the following steps are taken:
-
Asbestos and Lead Testing: Hire a certified environmental hygienist to take samples from the drywall, mastic, and exterior paint.
-
Underground Tank Sweeps: Use ground-penetrating radar to locate old septic tanks or heating oil tanks that need to be decommissioned.
-
Arborist Consultation: Identify heritage trees that municipal laws protect, and establish “no-go” zones with fencing to protect their root systems during heavy machinery operation.
Establish a Grading Plan to Prevent Future Flooding
Water is the ultimate enemy of any home. If your land is not properly contoured before the foundation is poured, you are inviting moisture intrusion, mold, and structural settling. A comprehensive grading plan is non-negotiable. The goal is to manipulate the earth so that gravity naturally pulls surface water and groundwater away from your future home.
The golden rule of grading is that the soil should drop at least 6 inches for every 10 feet away from where the foundation will sit. Achieving this often requires moving hundreds of tons of dirt. You may need to cut into hillsides, build retaining walls, or import clean fill dirt to elevate the building pad.
Partnering with a reliable local excavating company early in the process ensures your lot is leveled properly and compacted to the correct density. They will use heavy machinery like bulldozers and skid steers to sculpt the land according to the civil engineer’s topographical map, mitigating the risk of water pooling against your future foundation.
-
Topsoil Preservation: Have the top layer of nutrient-rich soil scraped off and stockpiled in a corner of your lot to be reused later for landscaping.
-
Compaction Testing: After fill dirt is added, ensure it is tested with a nuclear density gauge to confirm it will not settle under the weight of the house.
-
Erosion Control: Install silt fences and straw wattles around the perimeter of the disturbed earth to prevent mud from washing into municipal storm drains during rainstorms.

Phase 2: Utilities and Foundation Basics
With the land cleared and properly graded, the project transitions into establishing the critical lifelines of the house and pouring the literal foundation the home will rest upon.
Test Water Yield and Quality Before Laying Pipes
For those building in rural areas or off-grid locations away from municipal water supplies, establishing a reliable water source is a make-or-break milestone. You cannot finalize a plumbing layout, order fixtures, or even secure a final certificate of occupancy without a proven, potable water supply.
Before committing fully to your home’s placement, you must conduct a rigorous pump test. This involves drilling the initial borehole and measuring the exact flow rate. A standard household requires a yield of at least 3 to 5 gallons per minute to function comfortably, allowing for simultaneous activities like running the dishwasher and taking a shower.
Bringing in a specialized well drilling contractor early in the site development phase prevents the nightmare scenario of building a massive home on a lot that lacks a sustainable water supply. These professionals understand local aquifers, historical water tables, and the specific geological strata of your region.
-
Yield Testing: Run the pump test for a minimum of 24 hours to see how quickly the aquifer recharges under continuous draw.
-
Comprehensive Water Panel: Test the raw water for heavy metals, coliform bacteria, radon, and hard minerals like iron and calcium.
-
Filtration Planning: Use the results of the water test to design a whole-house filtration and softening system, allocating space for holding tanks in your mechanical room.
Monitor the Curing Process to Prevent Foundation Cracks
The foundation is the most critical structural element of your home. Whether you are building on a monolithic slab, a crawlspace, or a full basement, the integrity of the concrete dictates the lifespan of the house above it.
The biggest misconception about concrete is that it “dries.” In reality, concrete cures through a chemical reaction called hydration. If the water in the concrete mixture evaporates too quickly due to heat or wind, the hydration process stops prematurely, resulting in a weak, brittle foundation prone to deep structural cracking. Rushing this curing phase is the leading cause of structural failure in new builds.
You must exercise strict oversight when your concrete construction contractor is pouring the footings and walls. Ensure they are taking steps to slow down the moisture loss.
-
Moisture Retention: Keep newly poured foundations moist for at least 7 days. This can be achieved by draping curing blankets over the walls or setting up hoses for continuous light sprinkling.
-
Slump Testing: Before the pour begins, verify that the mixture has the correct ratio of water to cement. Too much water makes the concrete easier to pour but significantly weakens the final product.
-
Vapor Barriers: Ensure a thick, 10-mil puncture-resistant polyethylene vapor barrier is laid flawlessly under the basement or slab floor to prevent ground moisture from wicking up into the living space.
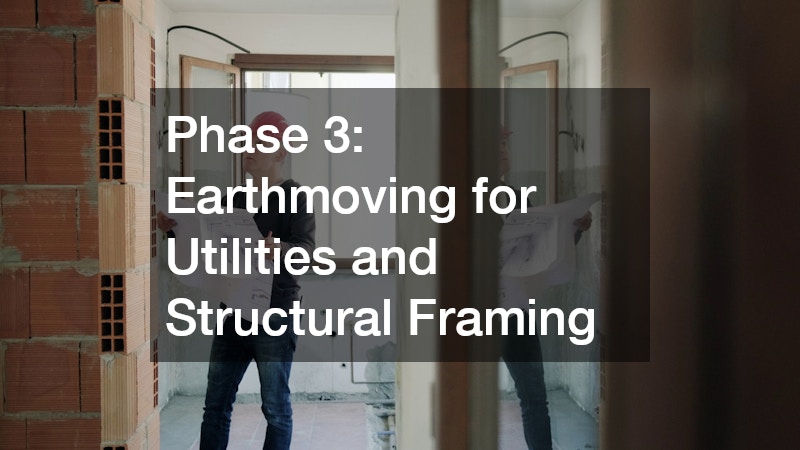
Phase 3: Earthmoving for Utilities and Structural Framing
This phase marks the transition from subterranean work to the “vertical” phase of building, where the skeletal structure of the house is erected and deep utilities are finalized.
Map Out Subsurface Utilities to Avoid Costly Rework
Before the framing begins and access to the site becomes restricted by lumber and scaffolding, all underground utilities must be trenched, laid, and buried. This includes your sewer or septic lines, municipal water connections, buried electrical conduits, and natural gas lines.
The logistics of deep trenching require precision. Trenches must be dug below the region’s specific frost line to prevent pipes from freezing and bursting during the winter. Furthermore, sewer lines require a precise, continuous downward slope (usually 1/4 inch per foot) to ensure waste flows out by gravity.
It is vital to maintain clear, constant communication with your excavation contractors during this phase. They need to coordinate with the plumbers and electricians so that trenches are dug to the exact specifications and left open just long enough for municipal inspections to occur.
-
Color-Coding: Physically stake out and spray paint the paths for different utilities using standard utility colors (red for power, yellow for gas, green for sewer).
-
Photographic Evidence: Take high-resolution photos and videos of the open trenches with a tape measure showing depth. This is invaluable if you ever need to dig in the yard years later.
-
Bedding the Pipes: Ensure pipes are bedded in soft sand or pea gravel before being buried with heavier backfill to prevent sharp rocks from puncturing the lines.
Demand Kiln-Dried Lumber to Prevent Warping
Watching the framing go up is often the most exciting part of the build for homeowners, as the 2D blueprints finally become a 3D reality. However, the quality of the wood used for this skeleton will dictate the long-term cosmetic and structural health of the interior.
“Green” or wet lumber contains a high amount of internal moisture. As the house is sealed and the HVAC system is turned on, this wet wood will dry rapidly, causing it to twist, shrink, and bow. This leads to a cascade of irritating problems: drywall seams will crack, nails will pop out of the walls, doors will refuse to latch, and floors will squeak endlessly.
To prevent this, specify in your materials contract that only lumber with a moisture content of 19% or less should be used. Working closely with skilled framing contractors ensures that this high-grade material is utilized correctly. They will ensure that load-bearing walls are perfectly plumb, floors are dead-level, and headers are appropriately sized to carry roof loads without sagging.
-
Advanced Framing Techniques: Discuss using 2×6 studs spaced 24 inches apart instead of the traditional 2x4s at 16 inches. This allows for thicker insulation cavities and reduces thermal bridging.
-
Engineered Wood: Opt for Engineered Lumber (like LVL beams and I-joists) for long floor spans, as they are manufactured to be perfectly straight and dimensionally stable.
-
House Wrap: Verify that the weather-resistant barrier (house wrap) is taped meticulously at every seam and integrated properly with window flashings to stop drafts and wind-driven rain.

Phase 4: Exterior Finishes and Custom Aesthetics
Once the home is framed and wrapped, attention turns to the exterior envelope. This phase is about marrying high-end curb appeal with uncompromising weatherproofing and durability.
Utilize Natural Stone to Boost Long-Term ROI
The materials you choose for the exterior of your home do more than just establish its architectural style; they serve as the primary armor against the elements. While vinyl and fiber cement siding have their places, incorporating heavier, natural materials elevates the property’s aesthetic and provides superior thermal mass, which helps regulate indoor temperatures.
When working with heavy facades like brick, real stone, or architectural block, moisture management behind the masonry is paramount. Brick and stone are naturally porous; they absorb rainwater. If there is nowhere for that water to go, it will rot the wood framing behind it.
Experienced masonry contractors know that the secret to a lasting exterior is the air gap. They will expertly lay the materials while ensuring a 1-inch minimum cavity exists between the back of the stone and the waterproofed framing. They will also install weep holes at the base of the wall to allow trapped condensation and liquid water to escape safely.
-
Flashing Integration: Ensure metal through-wall flashing is installed at the base of the brick ledger and above all doors and windows to kick water out of the wall assembly.
-
Mortar Selection: Match the mortar type to the stone. Using a mortar that is too hard for a soft natural stone can cause the stone faces to spall and crack during freeze-thaw cycles.
-
Sealing: Once cured, treat natural stone and grout lines with a silane-siloxane penetrating sealer to repel bulk water while allowing the masonry to breathe.
Choose Rust-Resistant Materials for High-Moisture Areas
Custom homes stand out through their unique architectural details. Upgrading the exterior hardware, roof accents, and railings from standard builder-grade materials to custom metals adds a distinct, modern edge. However, metal exposed to the elements is highly susceptible to oxidation, especially in coastal, humid, or heavily wooded environments.
If you want a standing seam metal roof, custom Juliet balconies, or intricate exterior stair railings, material selection is critical to avoid rust streaks staining your beautiful exterior walls a few years down the line.
Bringing in specialized architectural metal contractors allows you to fabricate custom pieces that are built to survive the local climate. They can guide you toward materials that offer longevity and require virtually zero maintenance.
-
Galvanized and Powder-Coated Steel: For structural brackets and railings, ensure raw steel is hot-dip galvanized and then powder-coated, baking a protective plastic-like finish onto the metal.
-
Aluminum: Use extruded aluminum for soffits, fascia, and window cladding. It is lightweight, structurally rigid, and naturally resists red rust.
-
Galvanic Corrosion: Never mix incompatible metals. Ensure your builders are not using copper flashing in direct contact with galvanized steel fasteners, as the chemical reaction will rapidly eat away the steel.

Phase 5: Energy Efficiency and Property Access
The final major construction phase focuses on two vastly different but equally important elements: sealing the home’s interior to lower utility bills and finalizing the property’s exterior accessibility and hardscaping.
Implement Continuous Thermal Barriers to Lower Utility Bills
A custom home should not just look beautiful; it should perform beautifully. Energy codes are becoming stricter, but building to the bare minimum code means you are just legally preventing the house from being condemned. To achieve true comfort and low energy bills, you must focus on a tight building envelope.
The traditional method of simply stuffing pink fiberglass batts between wall studs leaves gaps, compresses easily, and allows air to move through the walls. A superior approach involves creating a continuous thermal barrier. Prioritize high-density spray foam in the roof deck, rim joists, and any cantilevered floors, as these are the most common areas for massive heat loss and drafts.
Hiring certified insulation contractors to properly seal these critical junctions will drastically reduce the workload on the home’s HVAC system. They can apply closed-cell foam that acts as both a massive thermal insulator and a complete vapor and air barrier.
-
Blower Door Testing: After insulation and drywall, have an independent energy rater conduct a blower door test to measure how many air changes per hour the house experiences, identifying any hidden leaks.
-
Attic Strategy: Consider an unvented, conditioned attic assembly by spraying foam directly to the underside of the roof decking. This keeps your HVAC ductwork in a climate-controlled space, drastically improving efficiency.
-
Soundproofing: Don’t forget interior walls. Use mineral wool batts in the walls surrounding bathrooms, laundry rooms, and home theaters to significantly reduce sound transmission between rooms.
Pitch Your Hardscapes to Direct Runoff Away from the Home
The interior may be sealed and painted, but the property is not finished until the site is fully accessible and the final grading is locked into place with hardscaping. The driveway, walkways, and patios are massive impervious surfaces. When it rains, they collect hundreds of gallons of water that must be safely directed away from the home’s foundation and garage doors.
Proper base preparation is the key to hardscapes that do not heave, crack, or settle over time. The subsoil must be excavated, and a thick layer of crushed gravel must be laid and vibrated until it is rock-hard.
Coordinating with experienced paving contractors guarantees that whether you choose stamped concrete, asphalt, or permeable pavers, the surfaces can handle heavy delivery vehicles while supporting the property’s overall drainage plan.
-
Cross-Slope: Ensure your driveway and walkways maintain a minimum 1% to 2% cross-slope to shed rainwater efficiently into designated drainage swales or French drains, rather than letting it run flat toward the structure.
-
Base Depth: For concrete driveways, insist on a minimum of 4 inches of compacted gravel base and 4 to 5 inches of reinforced concrete to prevent cracking under the weight of SUVs.
-
Curing Hardscapes: Just like the foundation, exterior concrete pads should be sealed with a curing compound immediately after finishing to prevent surface flaking and spalling from winter road salts.
Conclusion
Building a custom home from the ground up is a marathon, not a sprint. It demands patience, financial discipline, and a willingness to immerse yourself in the granular details of construction. From the initial clearing of the raw land and the careful pouring of the concrete foundation to the meticulous sealing of the thermal envelope and the final pouring of the driveway, every phase builds upon the success of the last.
The most beautiful finishes in the world cannot hide a house with a failing foundation or drafty walls. Success lies in meticulous planning, vetting every professional thoroughly, and absolutely refusing to cut corners on the structural and foundational elements that make a house safe and enduring.
If you are embarking on this incredible journey, bookmark this guide. Start a physical binder today for your building permits, soil reports, and architectural inspiration. By respecting the process and prioritizing the science of building alongside the art of design, you can confidently turn a patch of raw dirt into the custom dream home you will enjoy for decades to come.