
Owning a home comes with ongoing responsibilities, and regular maintenance is essential to keeping your property safe, comfortable, and in good condition. From plumbing leaks and roof damage to faulty heating systems and poor ventilation, small issues can quickly turn into expensive problems when left unaddressed. Following a proactive approach to home repairs helps homeowners identify potential damage early, reduce unexpected expenses, improve energy efficiency, and extend the life of essential home systems.
A year-round home repair plan makes property maintenance easier to manage by organizing tasks according to seasonal conditions and household needs. Spring is an ideal time to inspect the roof and exterior after harsh weather, while summer offers opportunities to address structural issues and outdoor repairs. Fall preparations can help protect plumbing, roofing, and heating systems before colder weather arrives, and winter is a good time to check for drafts, monitor indoor moisture, and address urgent repairs.
This guide to essential home repairs covers practical maintenance tasks to consider throughout the year. By following a seasonal schedule, you can prioritize important repairs, prevent avoidable damage, maintain a more energy-efficient home, and protect your property’s long-term value. Whether you are a first-time homeowner or have years of experience maintaining a property, a consistent repair plan can help you keep your home in reliable condition in every season.
Spring: Restoring the Exterior and Securing the Perimeter

As the snow melts and the ground begins to thaw, your home reveals the scars of winter. Spring is the season of recovery. The freeze-thaw cycle—where water seeps into cracks, freezes, expands, and then melts—is one of the most destructive forces in nature, capable of splitting rock and shifting concrete. Your first priority in the spring is to inspect the “hard” elements of your home’s exterior and ensure your entry points are functional for the active months ahead.
Inspecting Hardscapes and Foundations
Start by walking the perimeter of your property. You are looking for damage to your driveway, walkways, retaining walls, and the foundation itself. During winter, moisture trapped in porous materials like brick and concrete can cause spalling (flaking) or deep structural cracks.
Pay close attention to the mortar joints between bricks or stones. If you see crumbling or missing mortar, this is an entry point for water. Over time, water infiltration here can compromise the structural integrity of a wall or chimney stack. While minor hairline cracks in concrete can often be sealed with a DIY caulk, significant shifting, large fissures, or bulging retaining walls require a professional eye. Bringing in a skilled
masonry contractor early in the season allows you to address these structural vulnerabilities before spring rains saturate the soil and increase hydrostatic pressure against your foundation.
Additionally, check your patio pavers and stone walkways. Heaving ground can create trip hazards. Re-leveling these areas now prevents injury and ensures proper drainage away from your home’s foundation.
Testing and Lubricating Entry Systems
Spring often marks the beginning of increased coming and going. Families spend more time outside, and yard maintenance equipment is frequently moved in and out of storage. This increase in traffic means your automated entry systems need to be in peak condition.
Winter road salts, grit, and moisture can wreak havoc on the moving parts of automated driveway entrances. Inspect the hinges, tracks, and rollers for signs of rust or debris accumulation. Clean these components thoroughly and apply a high-quality, weather-resistant lubricant. It is also critical to test the safety sensors. These optical eyes can easily become misaligned by shifting ground or being bumped by snow removal equipment. If your property relies on an automated barrier for privacy or to keep pets and children safe, a malfunctioning
security gate becomes a major liability. Ensure the backup battery is charged and the manual release mechanism functions smoothly so you are never locked out during a spring power outage.
Late Spring: Preparing Your Cooling Infrastructure

Before the heat of summer truly settles in, there is a critical window of time in late spring—usually April or May—when you must address your cooling systems. Waiting until the first ninety-degree day to test your air conditioner is a gamble that often results in sweating through a weekend while waiting for an available technician.
The Pre-Season Cooling Tune-Up
Your cooling system has likely sat dormant for months, accumulating dust and potentially housing small pests. The first step is a physical inspection of the outdoor condenser unit. Over the fall and winter, leaves, twigs, and tall grass may have crowded the unit. This debris restricts airflow, forcing the system to work harder to dissipate heat, which drives up your electricity bill and shortens the unit’s life. Clear a two-foot radius around the unit to ensure it can “breathe.”
Next, check the refrigerant lines running from the outdoor unit into the house. The insulation on these lines should be intact; if it is dry-rotted or missing, replace it to maintain efficiency. Inside, change your air filter immediately. A clogged filter is the number one cause of system failure, as it restricts air intake and can cause the evaporator coils to freeze.
However, DIY maintenance has its limits. It is highly recommended to schedule professional
air conditioning repair for a preventative tune-up. A technician can check refrigerant levels (a closed system shouldn’t lose fluid, so low levels indicate a leak), test the amperage of the compressor, and clean the coils. Catching a capacitor that is on the verge of failure now is a fifty-dollar fix; waiting for it to blow the compressor in July is a two-thousand-dollar problem.
Knowing When to Upgrade vs. Repair
As you assess your cooling system, you may face a difficult decision: keep patching up an old unit or invest in a new one. A good rule of thumb is the “5000 rule.” Multiply the age of the equipment by the estimated repair cost. If the number exceeds 5,000, replacement is often the smarter financial move.
Older units often use phased-out refrigerants that are expensive to replace, and they likely have a SEER (Seasonal Energy Efficiency Ratio) rating far lower than modern standards. If your system is over 15 years old and struggles to keep up with demand, looking into
central air installation services before the peak season hits can be advantageous. Installing a new system in the mild spring weather is often easier and slightly cheaper than emergency installations in the dog days of summer. Modern systems also offer variable-speed blowers and smart thermostat integration, providing a level of comfort control that older single-stage units simply cannot match.
Summer: Maximizing Energy Efficiency and Indoor Health

When summer arrives, the focus shifts to “sealing the envelope.” You want to keep the expensive, conditioned air inside and the humid, hot air outside. Simultaneously, because the house is often closed up tight to conserve energy, indoor air quality becomes a paramount concern.
Seal the Envelope: Windows and Insulation
Your windows are the weakest link in your home’s thermal defense. In the summer, solar gain (heat entering through the glass) and thermal transfer (cool air escaping) can account for a massive portion of your energy costs.
Start by inspecting the weatherstripping around all operable windows. If it is brittle, cracked, or missing, replace it. It is a cheap and easy DIY task that pays for itself in one month of cooling bills. Next, look closely at the glass itself. If you have double- or triple-pane windows, look for condensation or “fog” trapped between the panes. This indicates that the vacuum seal has failed. When the seal fails, the window loses its insulating gas (usually argon) and becomes little more than a single pane of glass.
While you cannot re-seal the glass yourself, you often don’t need to replace the entire window frame. You can contact a
glass replacement company to swap out just the insulated glass unit (IGU). This restores the window’s thermal efficiency and removes the unsightly fog without the mess and expense of a full-frame construction project.
Improving Indoor Air Quality
With the windows closed and the AC running constantly, your home recycles the same air over and over. If that air is full of dust, pet dander, pollen, and mold spores, your family’s health can suffer, leading to summer colds and aggravated allergies.
The ductwork in your home acts as the respiratory system. Over years of use, ducts can accumulate inches of dust and debris. Worse, if there are leaks in the return ductwork (often located in attics or crawlspaces), the system might be pulling in dirty, unconditioned air from those spaces and distributing it throughout your clean bedrooms.
Inspect your vent covers. If you see heavy dust buildup on the grilles or dark streaks on the ceiling/floor around the registers, it is time to act. Professional
air duct cleaning and repair services can remove these contaminants using high-powered vacuums and agitation tools. More importantly, they can identify and seal leaks in the ductwork. Sealing these leaks not only improves air quality but also ensures that the air you paid to cool actually reaches the living spaces, rather than leaking into the attic.
Fall: Fire Safety and Heating Prep
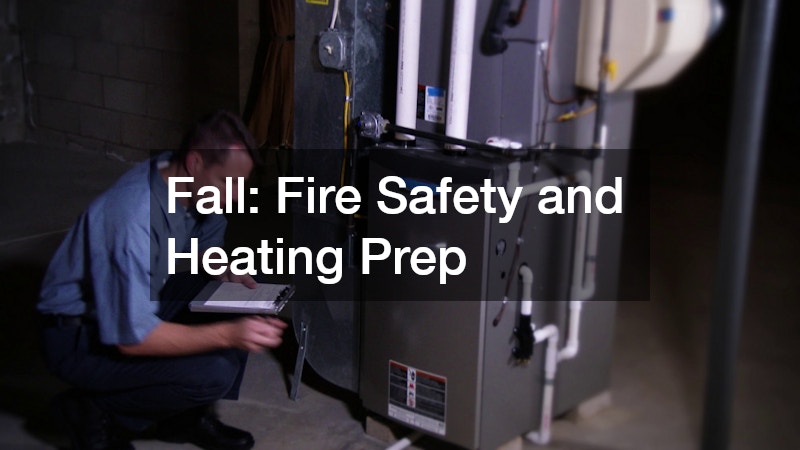
As the days shorten and the leaves turn, your focus must shift from cooling to heating. Fall is arguably the most critical season for safety inspections because heating systems—whether gas, oil, or wood—carry inherent risks of fire and carbon monoxide poisoning if neglected.
The Furnace and Boiler Safety Check
Before the first frost necessitates turning on the heat, you should perform a “test run.” Pick a cool September evening to turn your thermostat to heat mode. Listen for unusual noises—banging, screeching, or rattling—which can indicate loose belts or motor issues. You may smell a faint burning odor as dust burns off the heat exchanger, which is normal for the first run, but persistent smells are a warning sign.
The most critical safety check involves the heat exchanger. This metal component separates the combustion gases (carbon monoxide) from the breathable air circulating in your house. Over time, heat exchangers can develop cracks due to metal fatigue. A cracked exchanger can leak deadly gas into your home. This is why annual
heating services are non-negotiable. A professional technician will use a combustion analyzer to ensure the burner is efficient and, crucially, check the exchanger for cracks. They will also clean the flame sensor and pilot assembly, ensuring the system ignites reliably when you need it most.
Preparing the Hearth
If your home has a fireplace, it is the centerpiece of winter comfort, but it is also a contained fire inside your living room. Neglected chimneys are a leading cause of house fires.
For wood-burning fireplaces, the enemy is creosote—a tar-like byproduct of burning wood that accumulates in the flue. Creosote is highly flammable. If enough builds up, a stray spark can ignite a chimney fire that burns at over 2000 degrees Fahrenheit, cracking the chimney liner and spreading fire to the attic. Even gas fireplaces need attention; birds and small animals often build nests in unused chimneys during the spring and summer, creating dangerous blockages that can force carbon monoxide back into the home.
Schedule detailed
chimney inspections in early autumn. A certified sweep will send a camera up the flue to check for blockages, creosote buildup, and structural damage to the clay liner or mortar. Verifying that the chimney cap is secure is also vital, as it prevents rain and animals from entering the system.
Winter: Preventing Freeze Disasters and Mechanical Failures
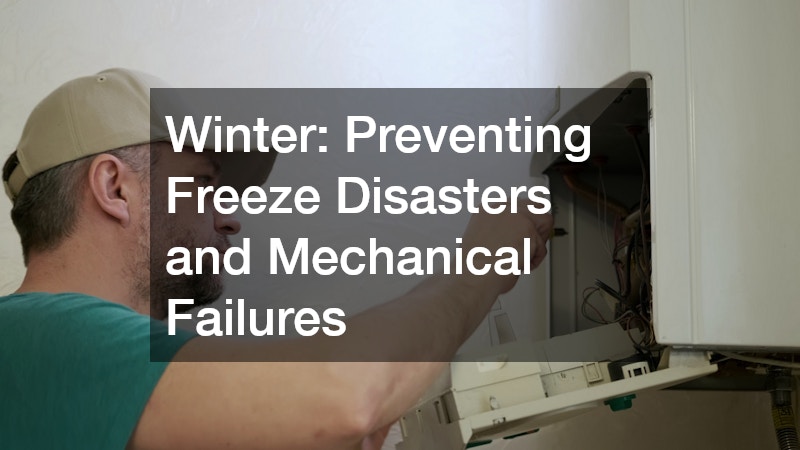
Winter is a test of endurance. Your home’s systems are subjected to extreme temperature differentials, and materials become brittle and prone to failure. The goal of winter maintenance is protection: keeping water flowing where it should and ensuring mechanical systems don’t seize up in the cold.
Water System Protection
Water expands when it freezes, and this simple law of physics causes millions of dollars in insurance claims every year. A burst pipe can release hundreds of gallons of water into your home in a matter of hours, destroying drywall, flooring, and electrical systems.
Prevention begins with insulation. Inspect pipes in unheated areas like basements, attics, garages, and crawlspaces. Foam pipe insulation is inexpensive and easy to install. Outside, disconnect all garden hoses and drain the spigots. If you have an irrigation system, ensure it has been professionally blown out to remove standing water.
You must also know the location of your main water shut-off valve. In an emergency, you don’t want to be searching for a valve while water pours through your ceiling. Test the valve to make sure it turns freely. If it is stuck or corroded, call a
plumbing service immediately to have it replaced. Having a relationship with a reliable plumber before a crisis occurs is invaluable; during a deep freeze, their schedules fill up instantly, and being an existing customer can often get you priority service.
Protecting Heavy Mechanisms from Cold Strain
Cold weather affects metal and grease. Metal contracts, tightening clearances between moving parts, while grease thickens and becomes viscous. This combination puts immense strain on heavy mechanical systems, particularly your garage door.
Your garage door is likely the heaviest moving object in your home. The springs do the heavy lifting, not the opener. In winter, a spring that is near the end of its life cycle is much more likely to snap due to the brittleness of the metal. Listen to the door as it opens. Is it struggling? Is it making loud grinding or screeching noises? These are signs of strain.
Check the balance of the door by disconnecting the opener (using the red emergency cord) and lifting the door manually about halfway. It should stay in place. If it slams down, the springs are weak. Do not attempt to adjust these springs yourself; they are under extreme tension and can cause serious injury. Contact a specialist for
garage door repair to adjust the tension and lubricate the rollers and tracks with a cold-weather lithium grease. Ensuring this door works is a safety issue—you do not want to be trapped in your garage with a car full of groceries during a blizzard because the door refuses to open.
Conclusion
Keeping your home in good condition throughout the year requires consistency, careful planning, and attention to small details. From inspecting exterior surfaces and checking essential systems to addressing minor damage before it worsens, each maintenance task contributes to a safer, more comfortable, and more dependable living space. A well-planned approach also helps you manage repair costs, avoid preventable damage, and make informed decisions about when to handle a project yourself or call a professional.
The best way to put this year-round home repair guide into practice is to create a maintenance calendar that fits your property’s age, condition, climate, and specific needs. Prioritize urgent safety concerns, keep track of recurring maintenance tasks, and set aside a budget for both routine upkeep and unexpected repairs. Remember that not every issue can wait for its scheduled season, so investigate warning signs such as persistent leaks, unusual electrical behavior, or structural changes as soon as they appear.
Ultimately, caring for a home is an ongoing responsibility rather than a once-a-year project. With a practical schedule and a willingness to address problems early, you can protect your investment, reduce unnecessary stress, and enjoy greater peace of mind for years to come. Make your next repair a planned step toward a stronger, safer, and more comfortable home.